- Home
- FAQ
- How to install a duo cup sink strainer on my sink?
Installation of Duo cup sink strainer
| How to install a duo cup sink strainer on my sink? |
|
How to install a duo cup sink strainer on my sink?  Here we draw each part of a duo cup sink strainer in sequence as below. From top to bottom, they are basket, strainer body, rubber gasket, paper washer, cup, lock nut, PE flange, Tailpiece, and connection nut. 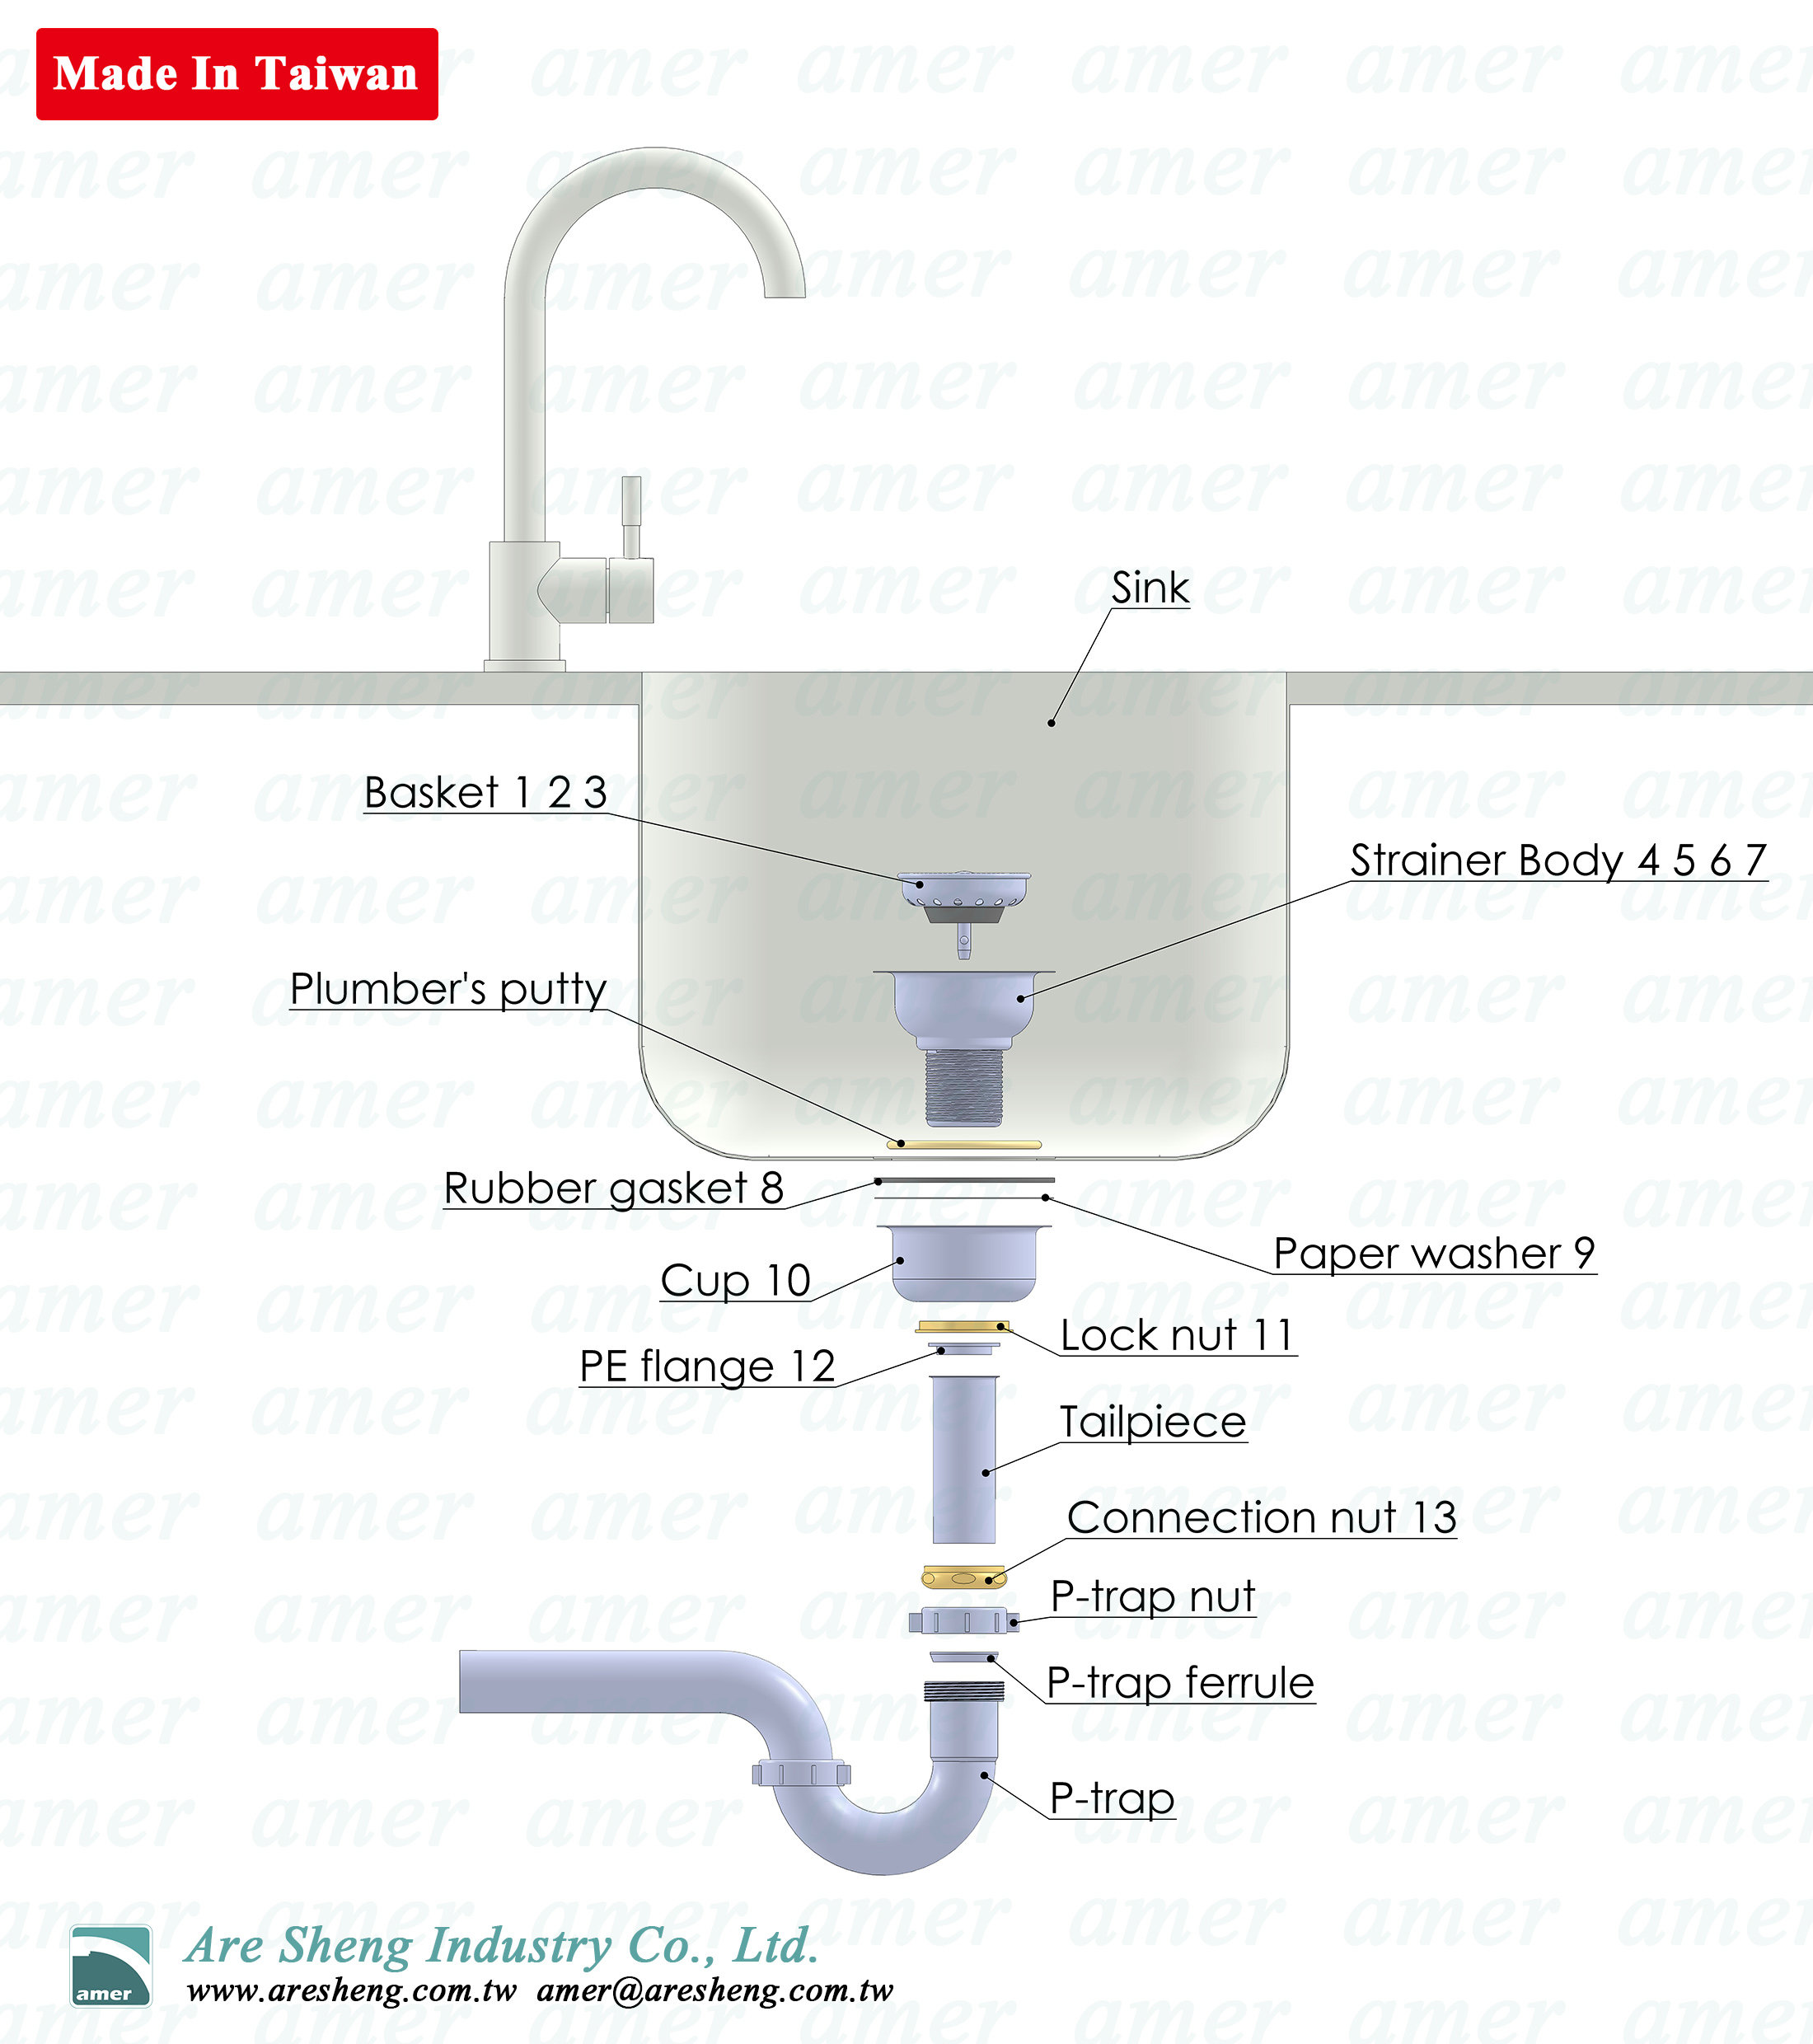 Here is the installation step. Step 1. Take some plumber’s putty and make it a circle. Put the plumber’s putty on the sink’s drain opening. Step 2. Put the strainer body on the plumber’s putty. Press it hardly. Step 3. Slide the rubber gasket and paper washer through the threaded shank. *Paper washer should be under the rubber gasket. The function is to avoid deformation of the rubber washer. Step 4. Screw on the lock nut on the shank until the cup and body is fixed firmly. Take a wrench to screw if you need. Step 5. Check the drawing as below. *Note the direction of the tailpiece. The side with flat edge is up. Slide the coupling nut from the bottom of the tailpiece. Put the PE flange on the tailpiece. *Note the direction of the PE flange in the drawing. Step 6. Screw the coupling nut on the threaded shank until they fix firmly. Step 7. Slide the P-trap nut on the tailpiece- also from the bottom. Squeeze the P-trap ferrule on the tailpiece. Screw the P-trap nut to the P-trap firmly.  Now, congratulations! You finish the installation! 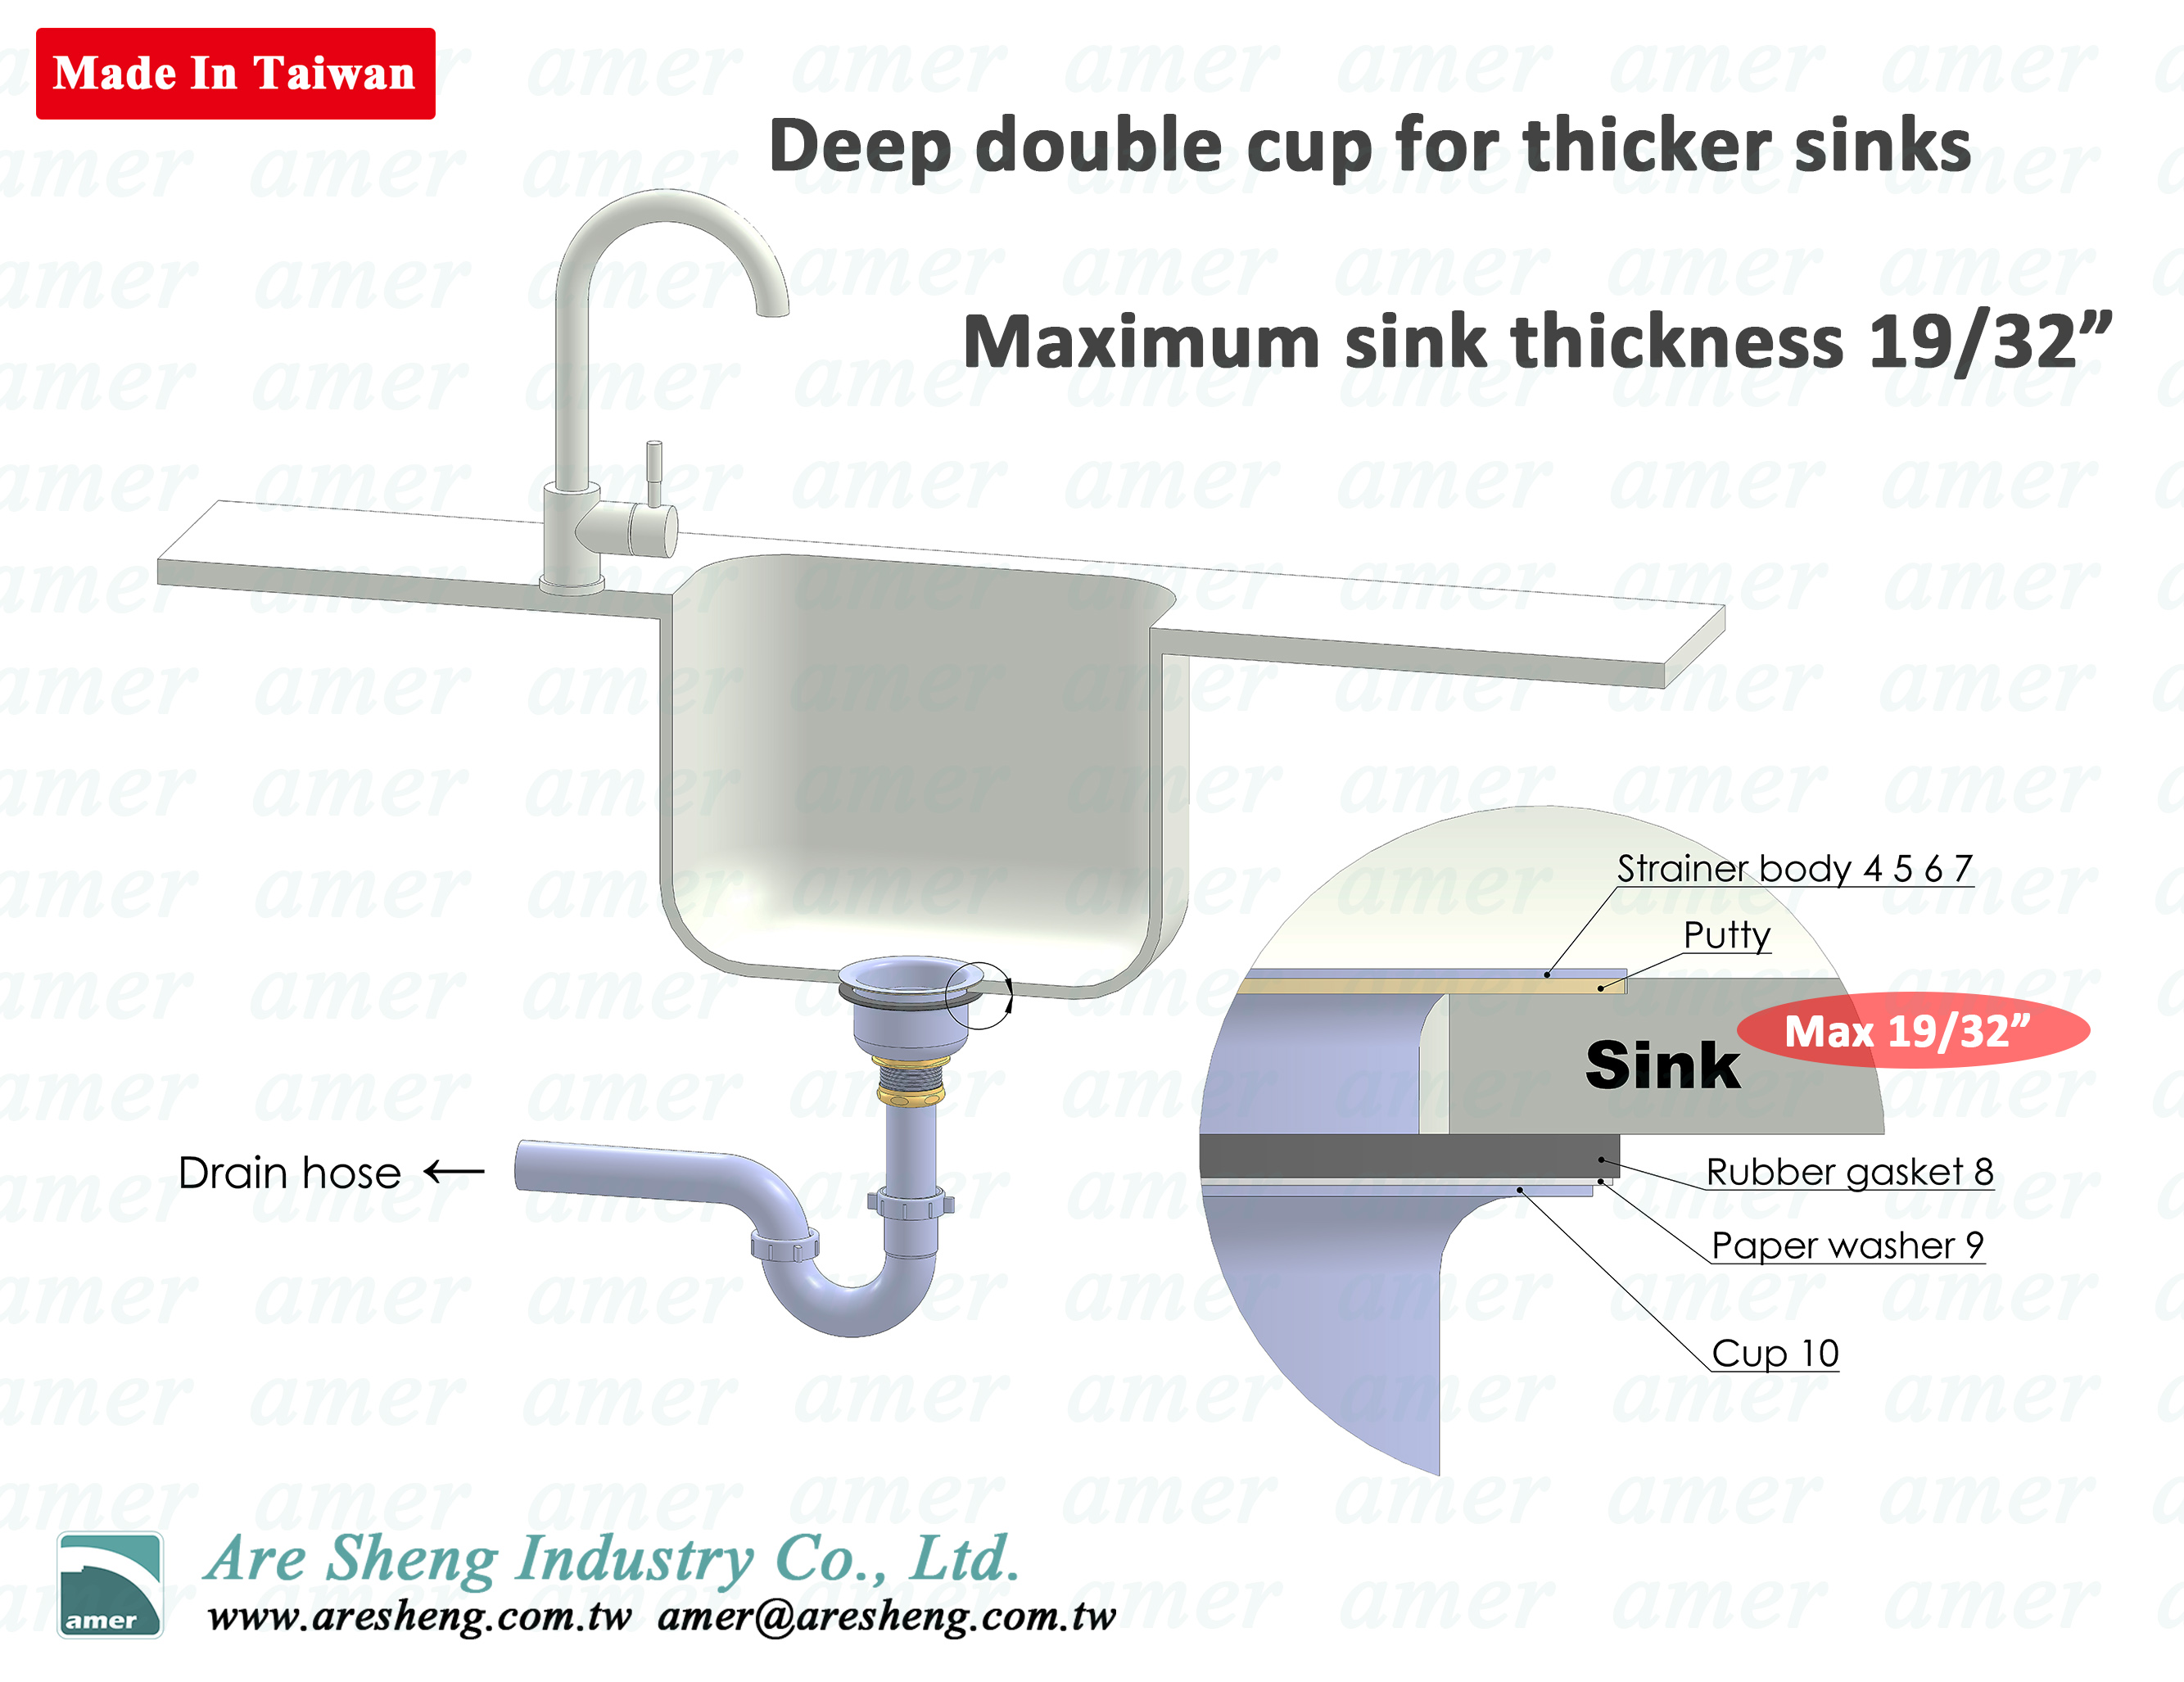
|